How to Manage Knowledge Base Category in ChatInsight.AI?
Table of Contents[ShowHide]
The Knowledge Base in ChatInsight.AI is organized into categories for efficient management. Each category serves as a container for related content, making it easier for users to navigate and find relevant information.
In this article, we will guide you on how to manage the Knowledge Base Category in ChatInsight.AI step by step.
- Step 1Accessing Your Knowledge Base
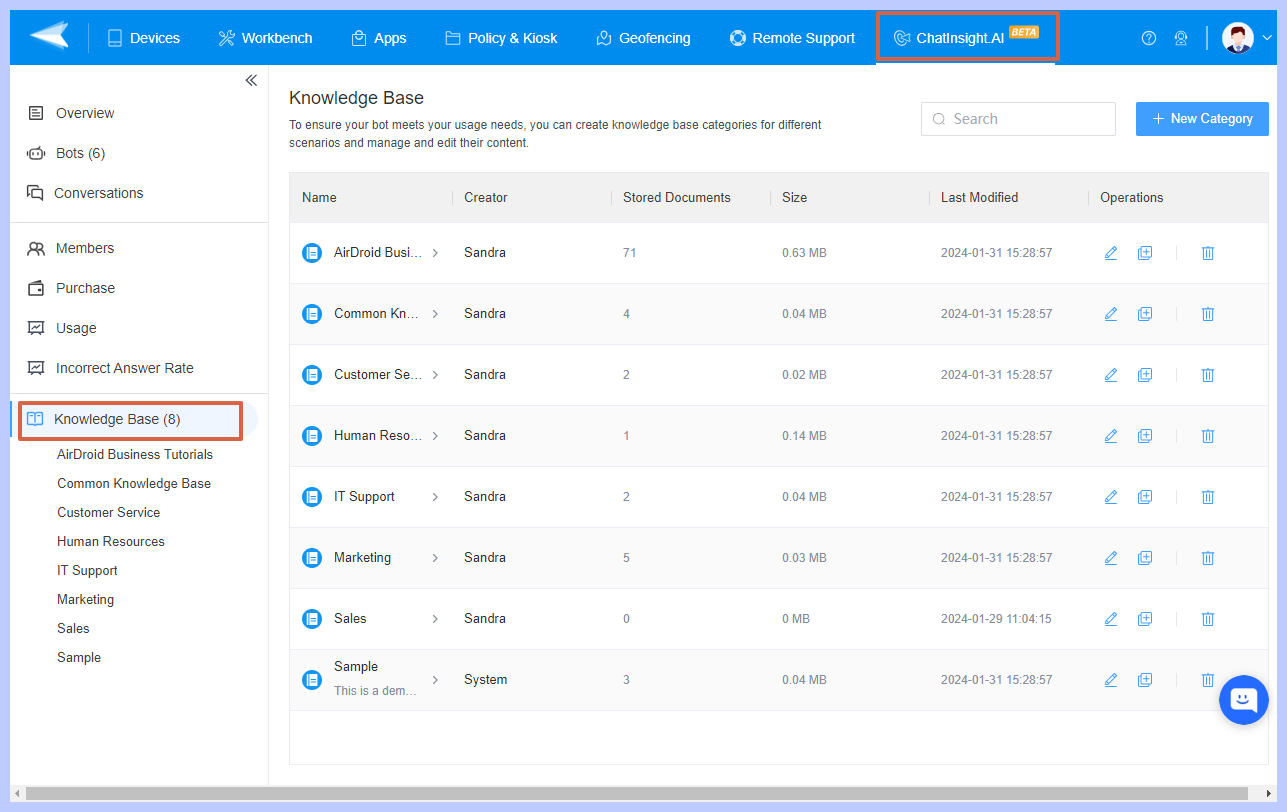
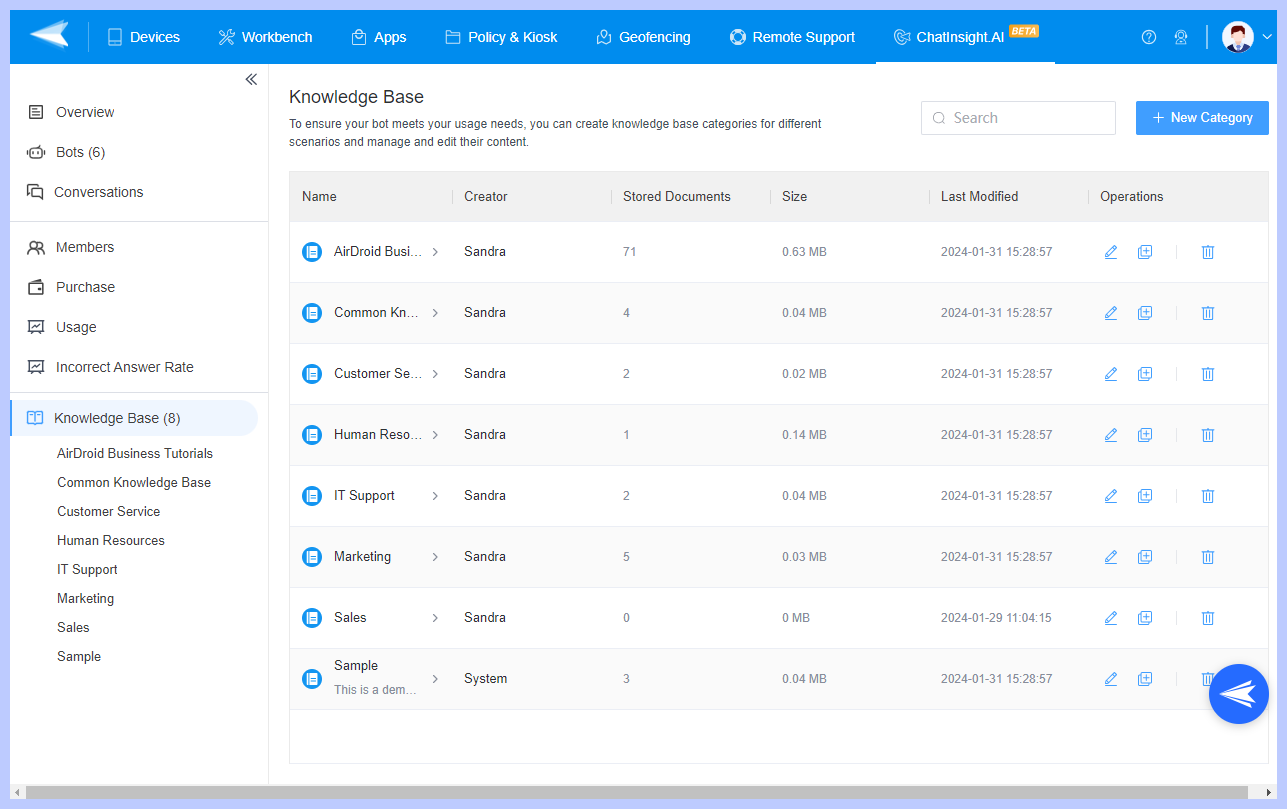
- After logging into ChatInsight.AI, navigate to the 'Knowledge Base' section from your dashboard. Here, you'll find a list of all your existing knowledge bases.

- Step 2Selecting a Knowledge Base Category
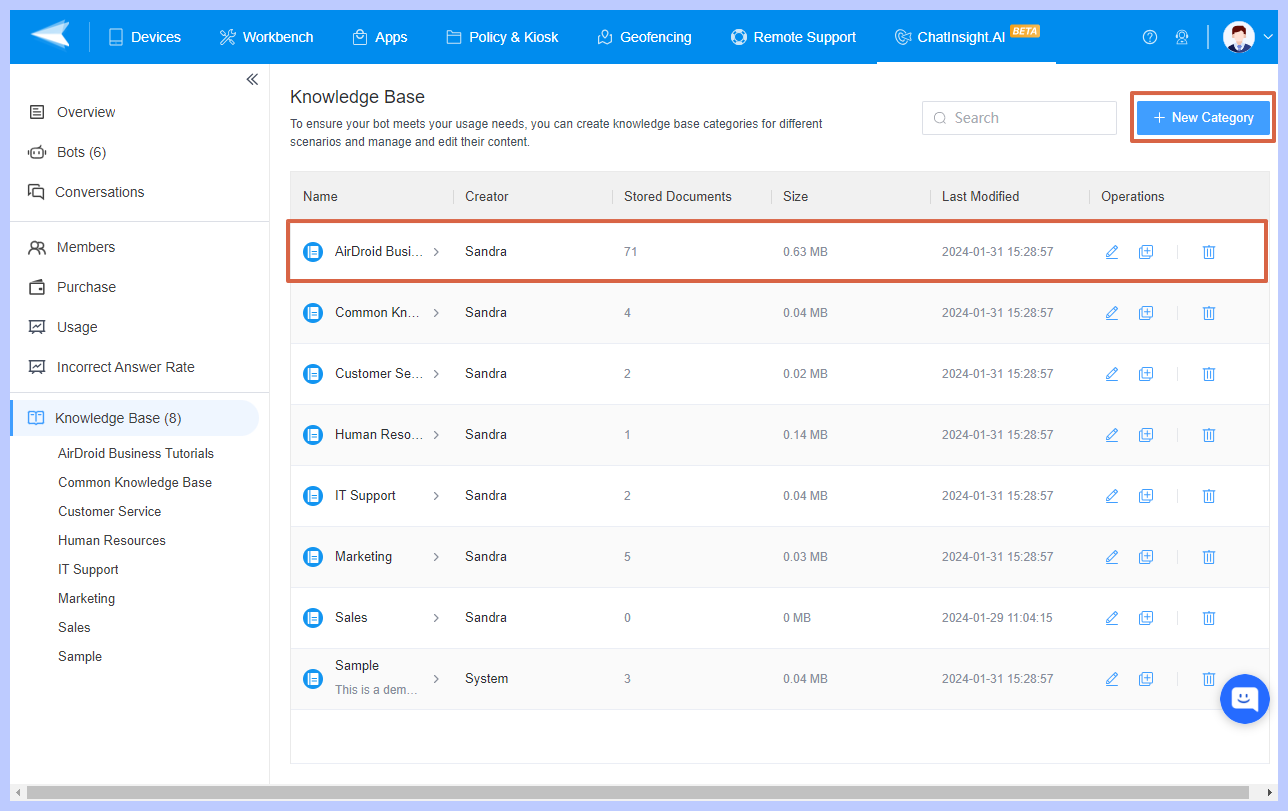
- To manage a specific category, select it from the list. If you have not created any categories yet, you can easily do so by clicking on "+ New Category".

- Step 3Reviewing Category Information
- Once you've selected a category, you can review its details including:

1Name
- By clicking the name of your target Knowledge Base Category, you can reach the document list of this category.
2Creator
3Number of Stored Documents
4Size
5Last modified date
- Step 4Performing Operations on the Category
1Edit
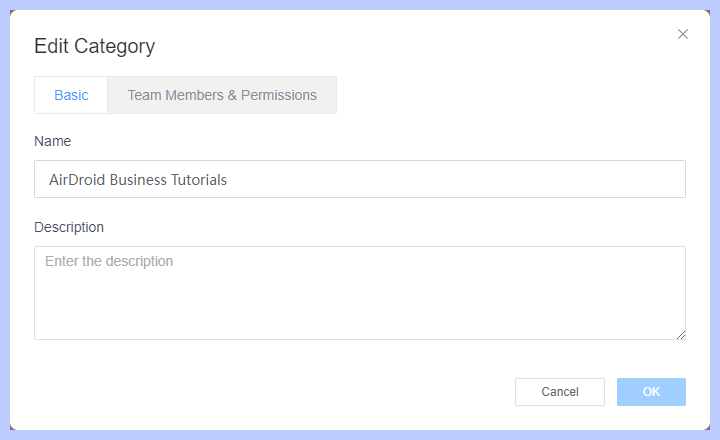
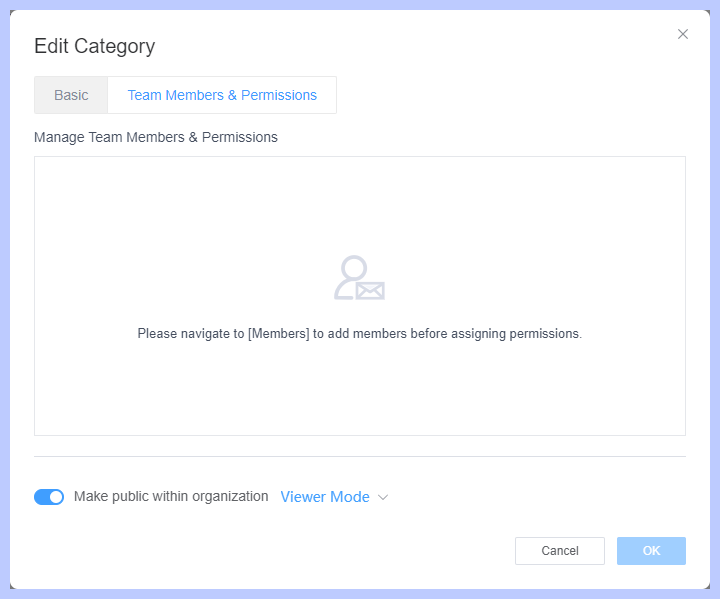
- You can edit the category's basic information and adjust team members' permissions as needed by clicking the "Editing Icon".


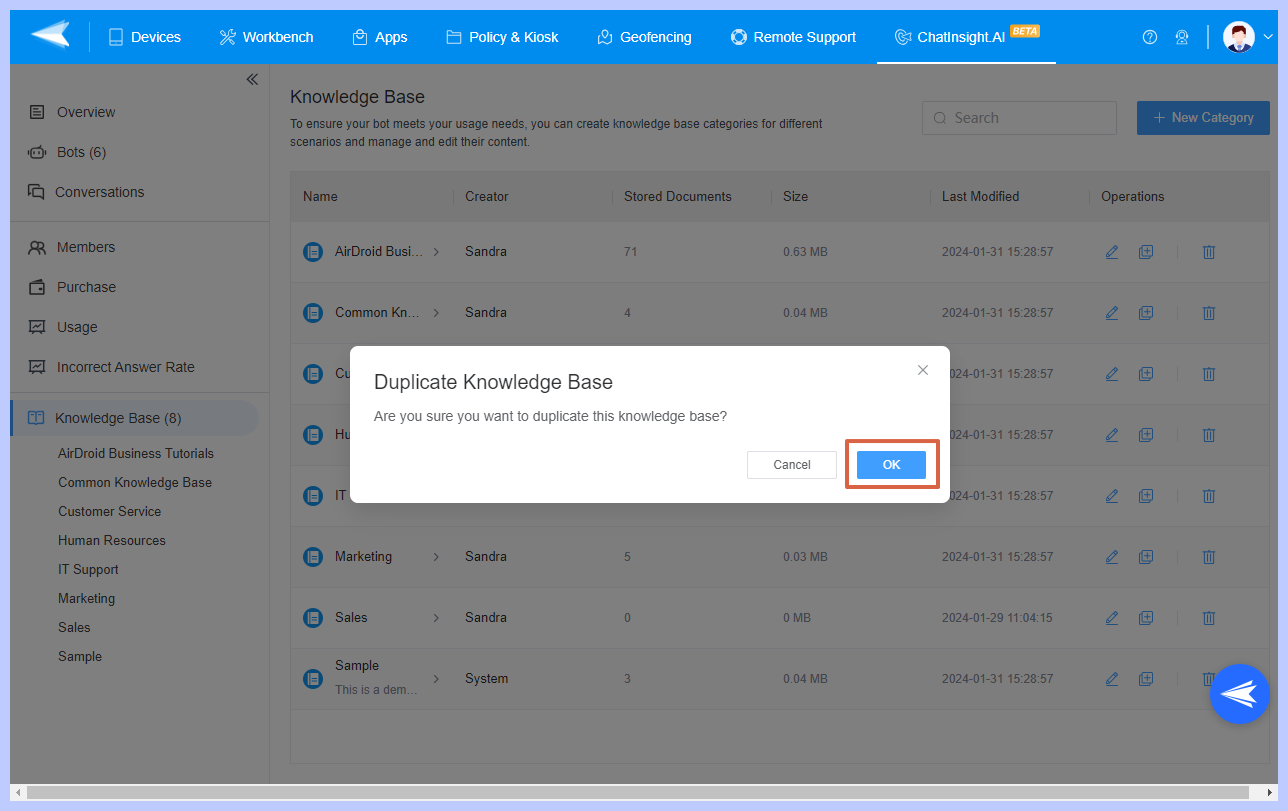
2Duplicate
- If you need to create a similar category, you use the "Duplicate" function to create a copy of the existing category.
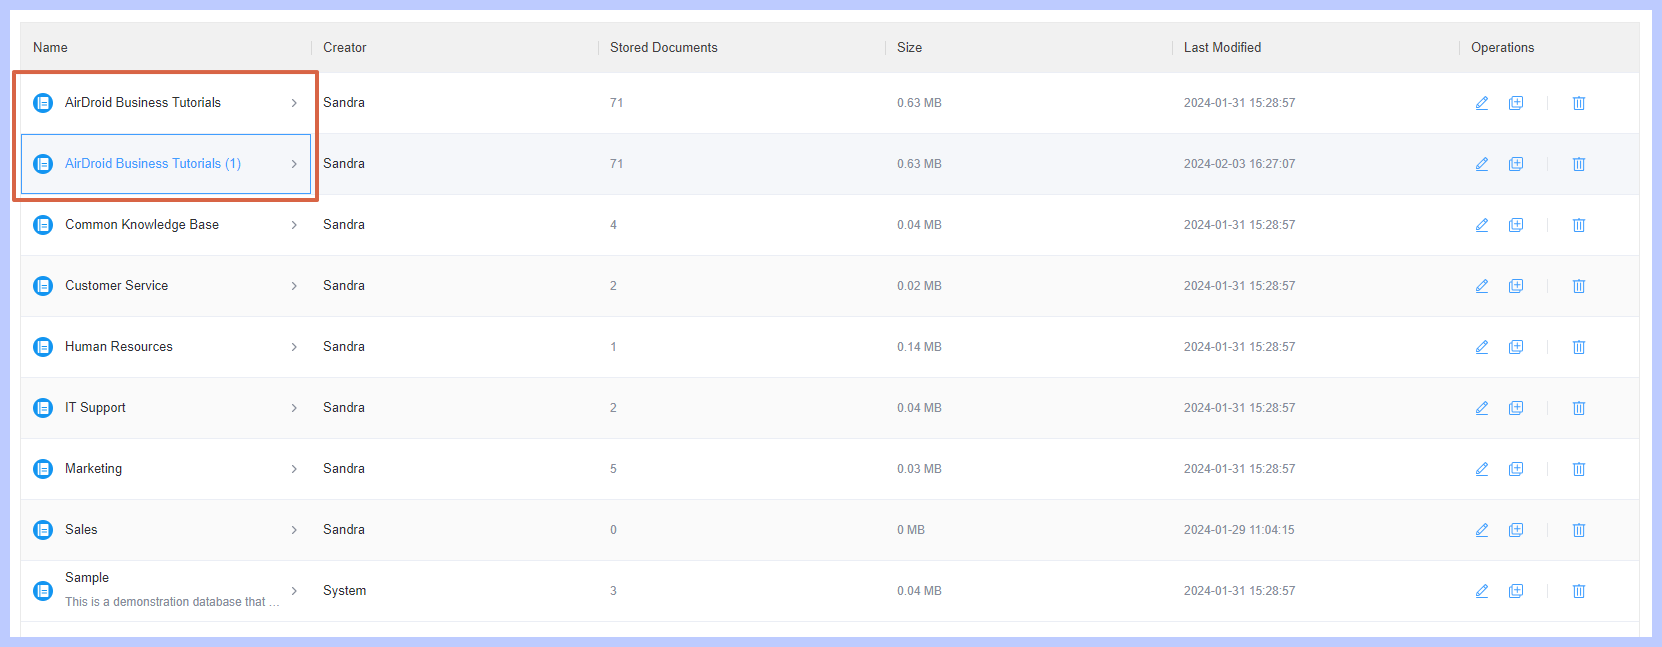
- Click the 'Copy' button in the Knowledge Base list. After confirming, a duplicate of the Knowledge Base will be created in the list, named "Master Name (1)".
- This copy will include all document entries, Knowledge Base settings, and document settings from the original Knowledge Base. The training status of the documents will also be replicated.


3Delete
- If a category is no longer needed, you can remove it by selecting "Delete" Button. Please note, this will also delete all the documents stored within the category.

Note : 1. This function is available to anyone with editing permissions or above.
2. This function is included in all pricing plans.
2. This function is included in all pricing plans.
Was This Page Helpful?
Still need help? Submit a request >>
