● Custom Business Copilot AI Chatbot;
● Available 24/7 to Enhance Support Experience;
● Personalized Training with Customized Knowledge;
● Instant Answers to Your Enterprise-specific Questions;
● No Coding Required to Support Multiple Languages.
Learn More
Start for Free
How to Customize Chatbot’s Style?
Customizing the style of a chatbot can offer several benefits for businesses. It allows businesses to create a visually appealing and consistent user experience that aligns with their brand identity. This can lead to improved engagement, customer satisfaction, and ultimately, business success.
To customize the style of your chatbot on ChatInsight AI, you can follow these steps:
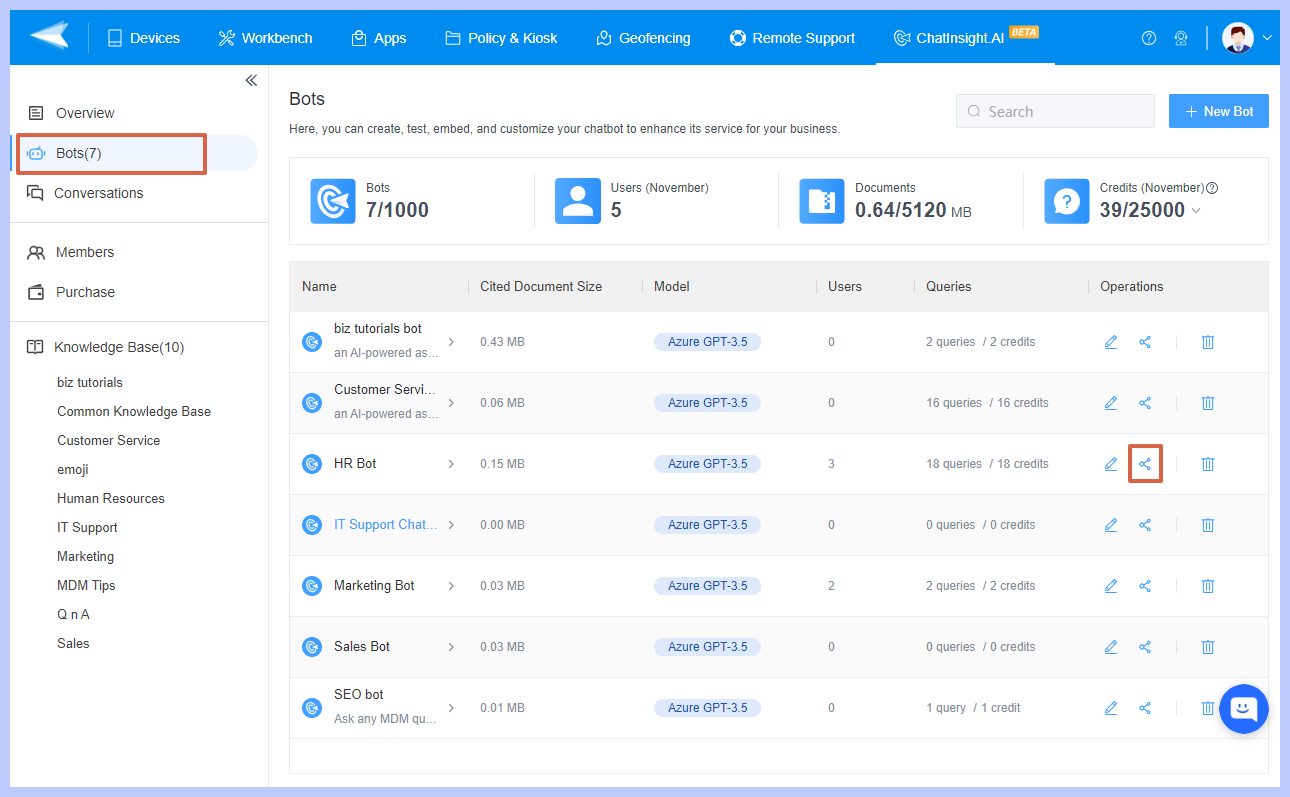
- Step 1Select the Bot to Customize
- Log in to your ChatInsight AI account. Go to the "Bots" dashboard, and select the Bot you want to Customize. Then click on the "Share" option to go ahead.

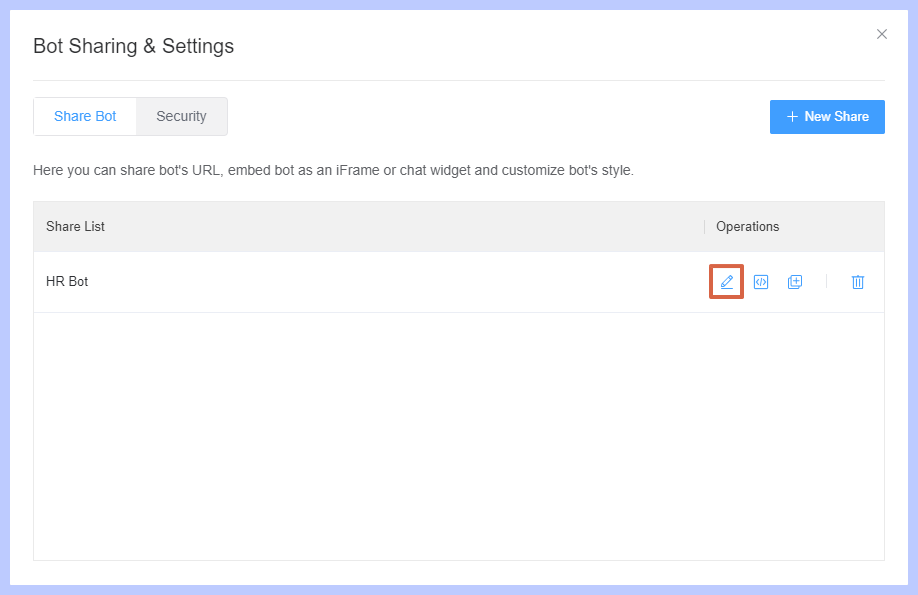
- Step 2Edict the Bot
- You will enter a tab, and from here you can share the bot's URL, embed the bot as an iFrame or chat widget, and customize the bot's style. Now click on the "Edit" option to customize the bot's style.

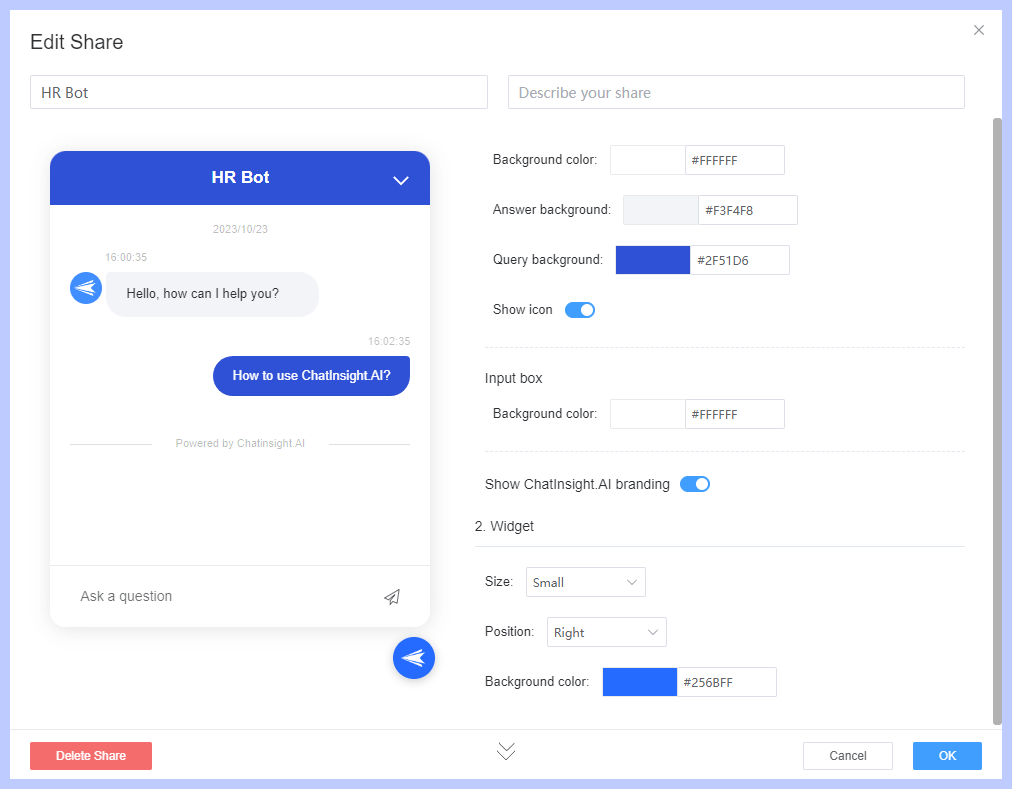
- Step 3Customize the Bot's Style
- Now you can set the chatbot's appearance, such as the layout, widget, and background color. Pay attention to the visual design of the bot's interface to ensure readability and a visually appealing experience for users. These settings may vary depending on your business's needs.
- Note : Ensure that the bot's style aligns with your brand's visual identity. Use your organization's logo, colors, and typography to create a consistent brand experience.

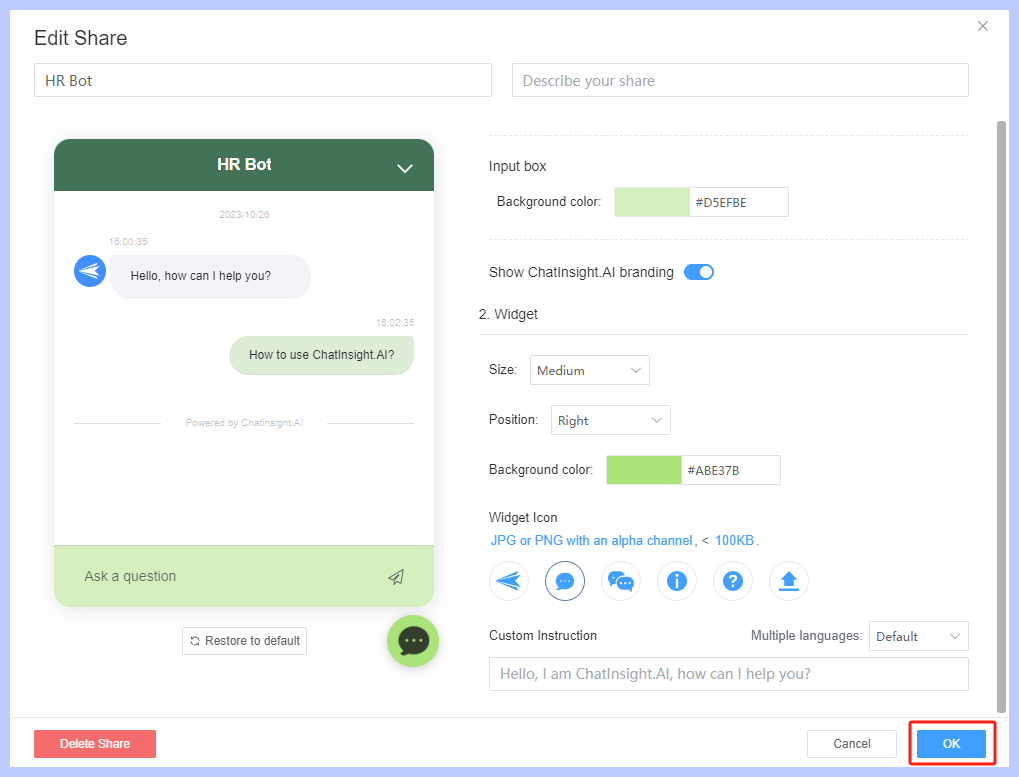
- Step 4Save the Bot's Style
- After finishing, click on "OK". Save your changes and test the chatbot to see how it appears to users.

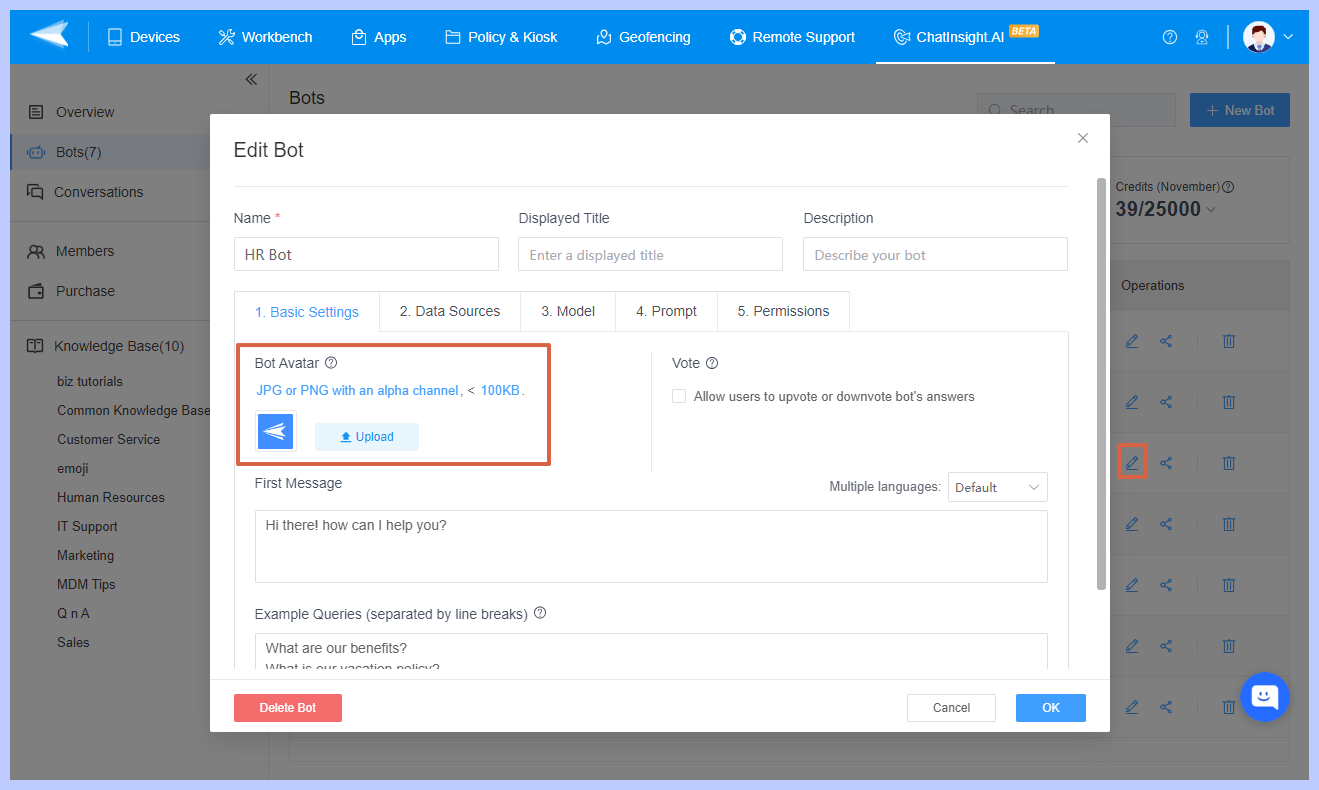
- Step 5Change the Bot Avatar
- If you want to change the Bot Avatar, you can return to the "Bots" dashboard, and select the "Edit" option. From "Basic Settings" you can upload the Bot Avatar.

Remember that successful bot customization is an ongoing process. Continuously monitor user interactions, collect feedback, and make adjustments accordingly to ensure the optimal performance of your bot.
Still need help? Submit a request >>