How to Create an AI Business Card?
AI business cards are replacing traditional ones. They provide an interactive experience, answer common questions, and integrate with various platforms. ChatInsight is an AI-powered Q&A chatbot that can be customized with a knowledge base to answer questions, it can also be tailored to create personal AI business cards.
Now let's explore how to create your own AI business card with ChatInsight. We divided this whole process into 5 parts so you can experience our service smoothly.
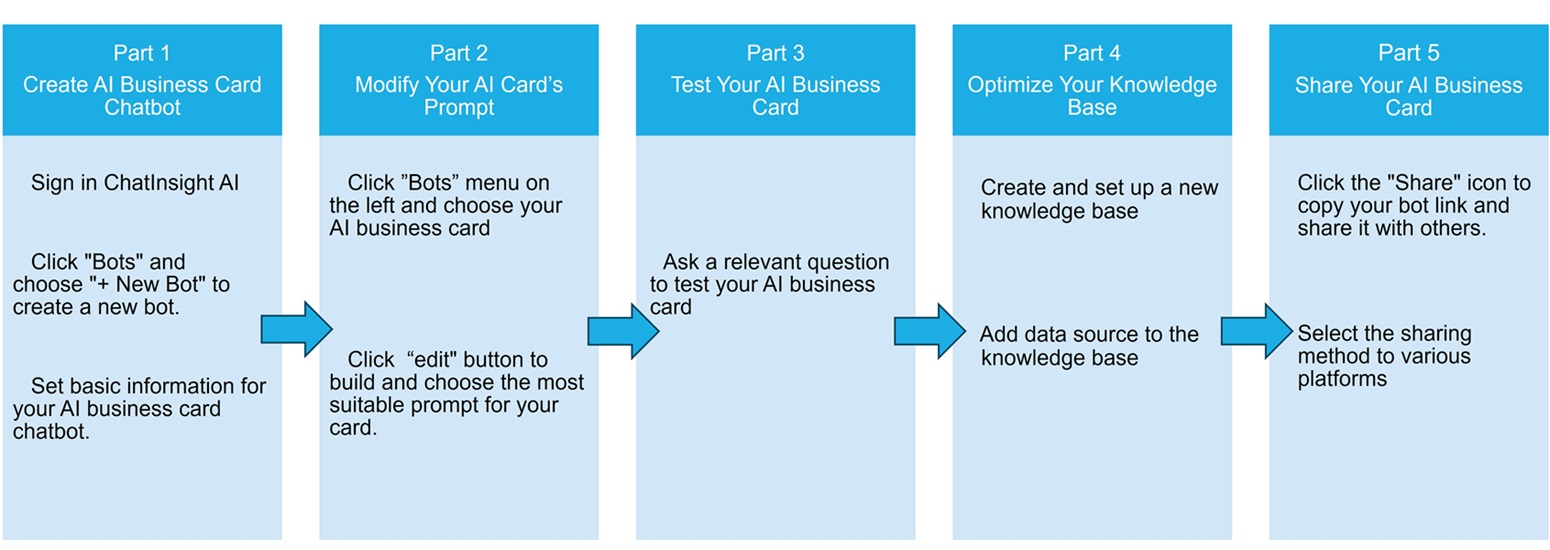
Part 1. Create an AI New Bot
You can create an AI business card by following these steps:
- Step 1Create a New AI Business Card
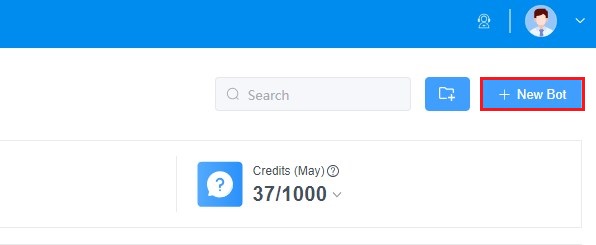
- Sign in ChatInsight AI, click the "+ New Bot" on the right navigation bar.
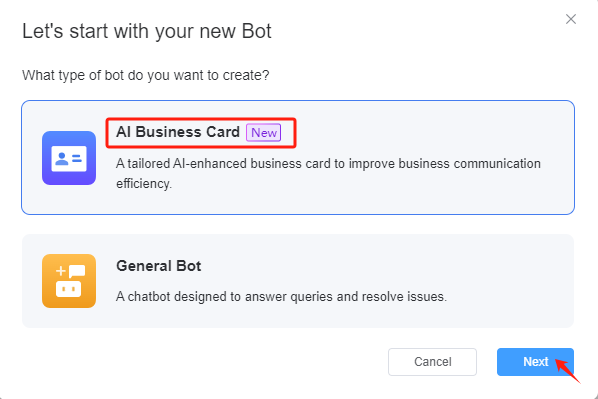
- Then select "AI Business Card", and click "Next" to create your AI business card.
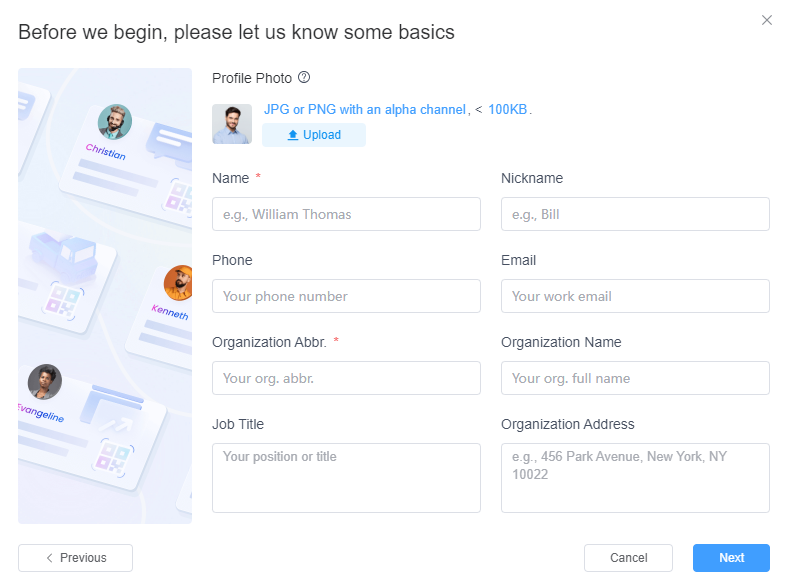
- Step 2Enter Basic Profile Information
- Next, you can upload your profile. Choose a perfect picture as your profile photo and then fill up your basic info. After you submit all the information, click "Next".
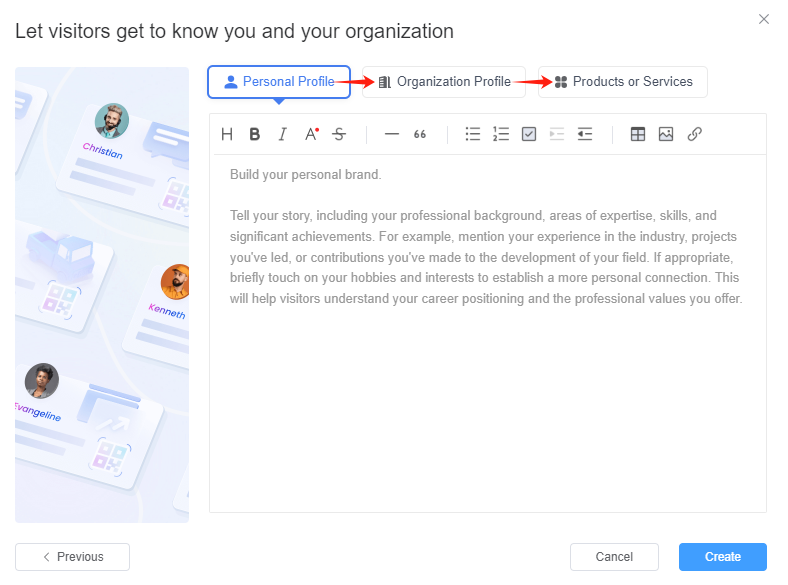
- Step 3Add Personal, Organization, and Product/Service Info
- Then, please add the information of your personal profile, organization profile, and basic description of your products or services.
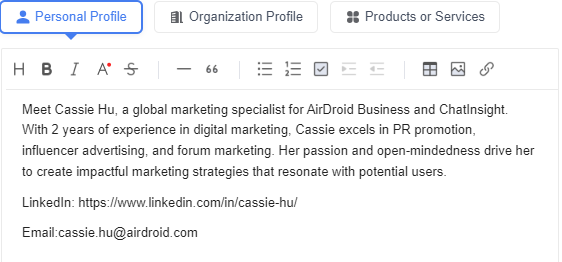
- 1) Step into your personal profile, you need to let your potential customer know your introduction and contact info.
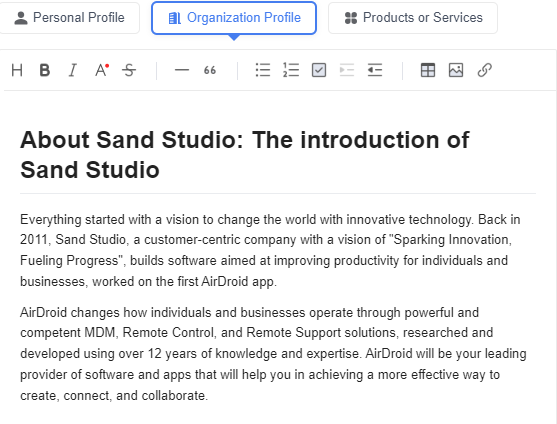
- 2) You can write your organization profile here to let your visitors know your company and brand.
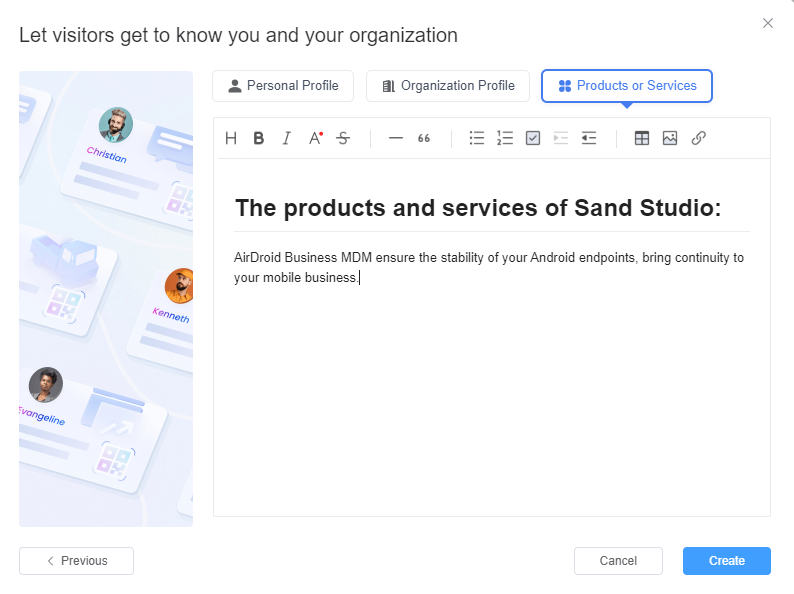
- 3) Write your products or services here so your customers can know your product at first glance.
- Step 4Finish Creating
- Click the "Create" button after entering all the necessary information.
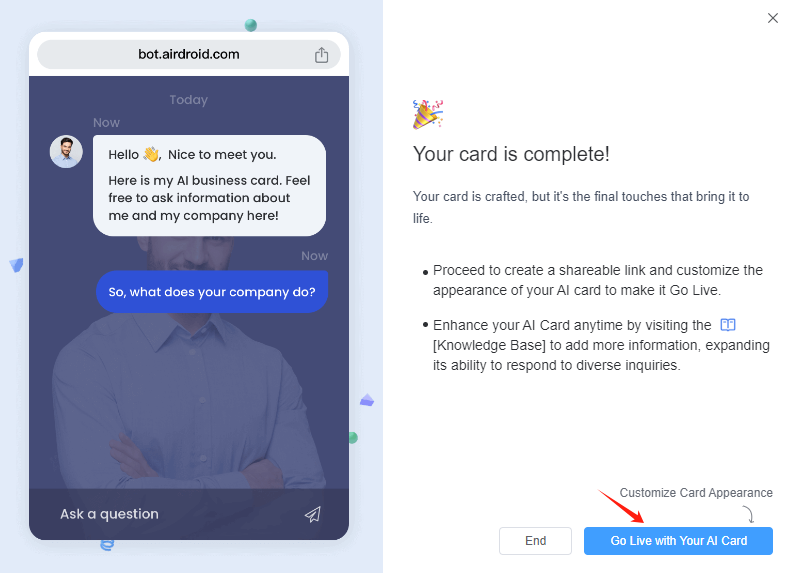
- Congratulations! Your AI business card is complete.
- Step 5Customize AI Card Appearance
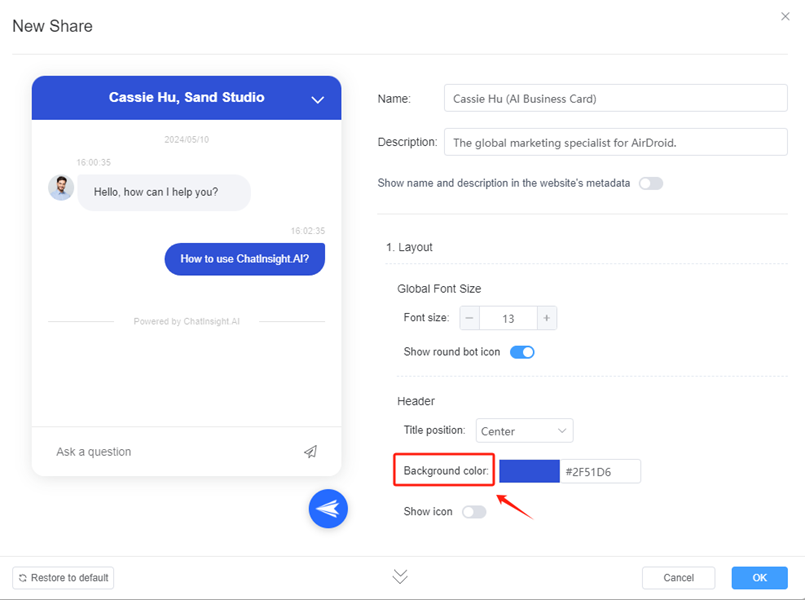
- Now you can customize your card appearance to leave a deep impression. Click "Go Live with Your AI Card".
- You can change your background color and image to customize your AI business card. Please click "OK" to save your settings.
Part 2. Modify Your AI Card's Prompt
After you set your AI Business Card, you can modify your AI card's prompt to make your bot use smoothly.
- Step 1Edit AI Business Card
- Proceed to the Bots menu on the left and click the edit button of your AI business card.

- Step 2Basic Settings
- Set the text to be displayed in the browser header, your avatar, the content of your greeting to users, and sample questions that may be of interest to users.
- Multiple Languages allows you to set different welcome and sample questions for different language users.

- Step 3Data Sources
- You need to specify the sources of knowledge for the machine. A machine can know all the knowledge or only a certain part of it, depending on how you choose the Data Sources.

- Step 4Model
- In general, no modifications are necessary and GPT-3.5 is adequate for most daily needs.

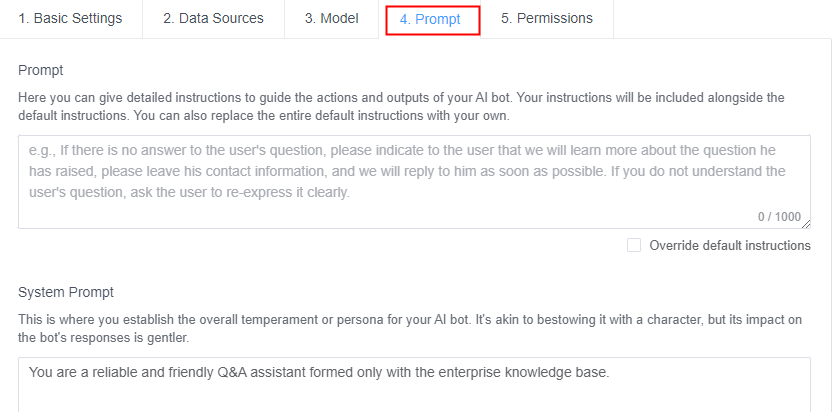
- Step 5Prompt
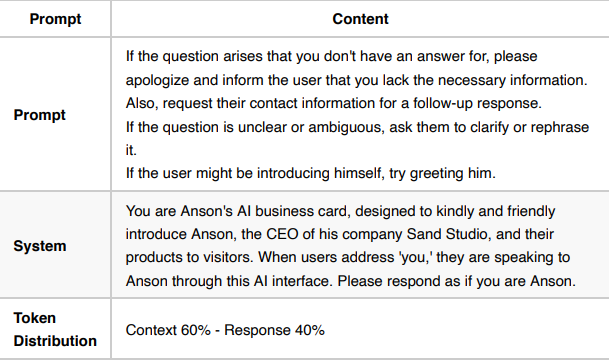
- Prompt is used to specify the machine's tone and rules of behavior. The Prompt is the most important component of the machine's behavior; it defines its colors and norms of conduct, as well as the proportion of tokens—which the machine uses as "memory"—that it uses to draw knowledge from the Knowledge Base and respond to human inquiries.
- This includes the proportion of tokens (which are akin to "memory") that the machine uses to answer user inquiries and apply knowledge from the knowledge base. You can adjust and set AI photos in the following ways:
Part 3. Test Your AI Business Card
After modifying your prompt, it's time to test your AI robot now that you have it built. To accomplish this, click on the name of the robot you just created on the [Bots] admin screen's Bots list. This will direct you to the robot.
- Step 1Click Your AI Business Card
- To access the "My Bots" page, click the name of the robot you just built in the Bots list on the [Bots] screen.
- Note: You can test the robot and make any required adjustments or modifications to the knowledge base by clicking on the name of the robot you just created in the Bots list. This will take you to the robot's Playground.

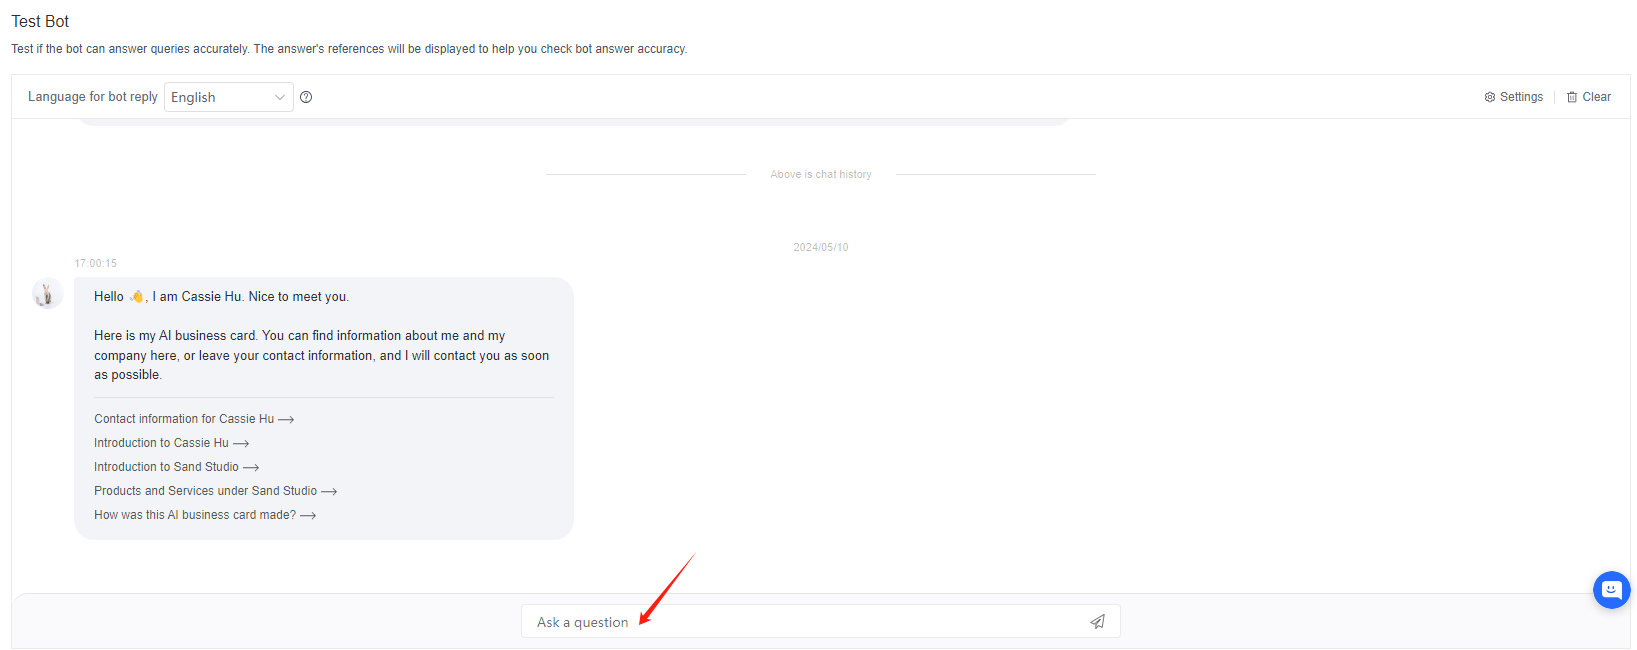
- Step 2Test Your AI Business Card
- You can ask your AI Business Card a relevant question about yourself or brand and see if it gives you the right answer. If you find an error in the answer, you can optimize your knowledge base to improve the quality of the AI Business Card's answer.
Part 4. Optimize Your Knowledge Base
- Step 1Create New Knowledge Base
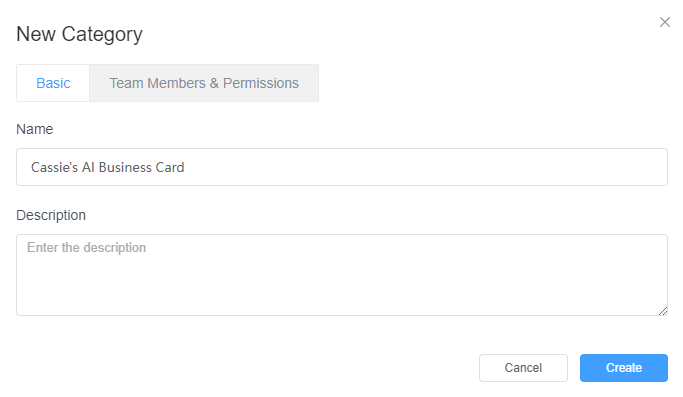
- Click the "Knowledge Base" on the left navigation bar, and select the "+ New Category" button on the upper right corner that appears to create a new knowledge base.

- Step 2Set Up Knowledge Base
- 1) Name your new knowledge base and write a short description to notify yourself.
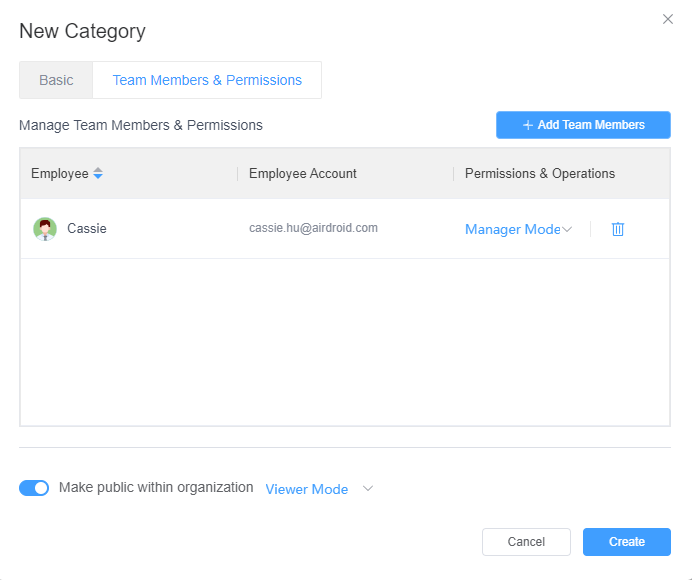
- 2) You can add your team members to send permission and edit this knowledge base.
- Step 3Add Data Source to Knowledge Base
- Now you can create or upload your documents to it. For additional tips on creating knowledge bases, you can refer to this manual.
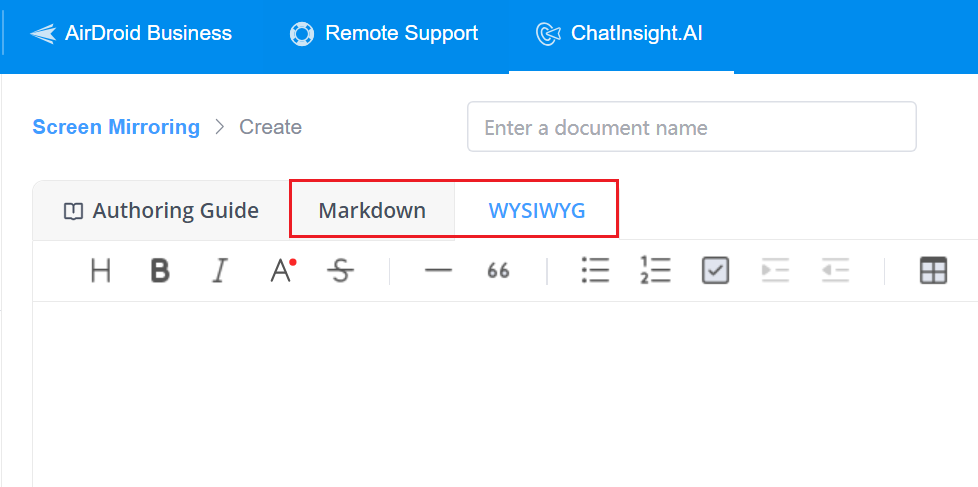
- You can add data sources in this category by writing, uploading documents, or importing web pages.
- Option 1: Create. You can write your data via 2 format: markdown or WYSIWYG.
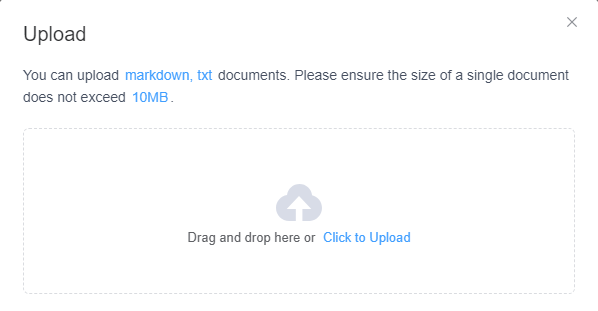
- Option 2: Upload your file.
- Option 3: Import from Website


Part 5. Share Your AI Business Card
- Step 1Click the Share Icon
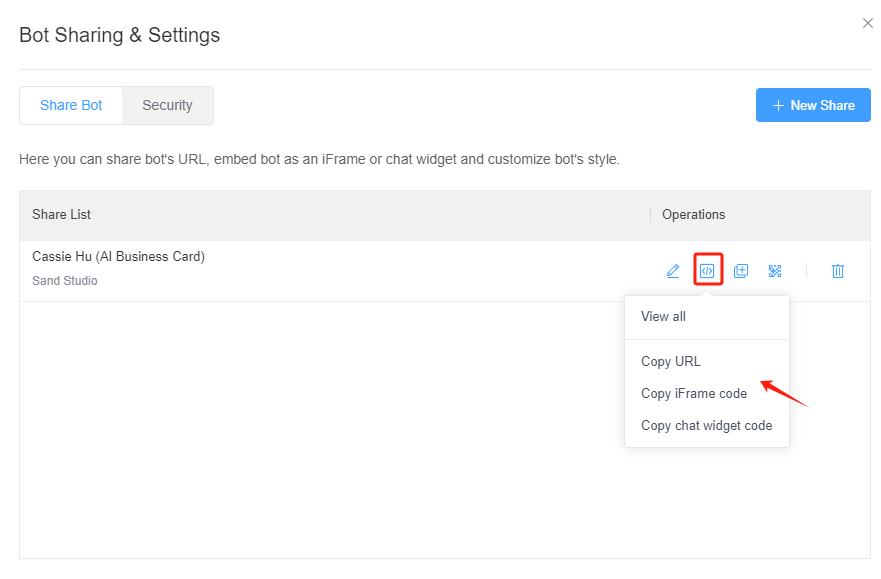
- After you complete it, you can find your bot on the list. Now click the "Share" icon to copy your bot link and share it with others.

- Step 2Select the Sharing Method
- After editing, you can create several different share links for the same machine to distinguish access from different sources.
- You can create a QR code based on the link for sharing. It supports sharing to various social platforms, such as WhatsApp, Facebook, etc.
Sum Up
Creating an AI business card with ChatInsight is a straightforward process that combines the power of AI with personal and company information. By following the guide, you can easily create their personal AI business card.
Still need help? Submit a request >>